Table of Contents
Shopify
With Shopify, your bot can show and gather information during conversations, including customers, products, discounts and shop details.
Setup Shopify
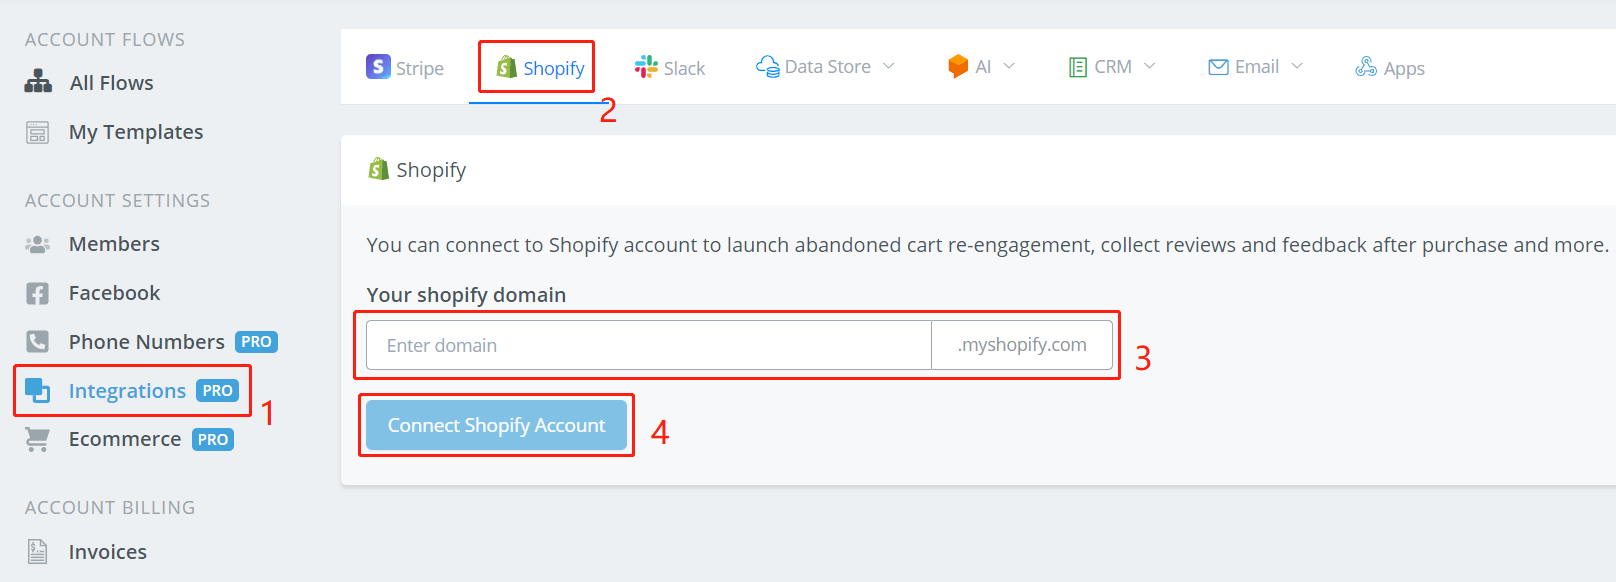
By following the above 4 steps, jumping to Shopify's website and logging in yourself, you can easily connect your Shopify account to Botbuz.
After connection, you will then be able to use Shopify in your Action step. As follow are the functions you can utilize. Descriptions for each field will be put on corresponding photos.
TIP
The functions work via API calls. This means that, by giving some inputs, you get your outputs from the servers. The outputs are saved in custom fields for future uses.
Use Shopify in Action Step
- Search for Customers
- Get Customer Info
- Get Customer Orders
- Get Customer Abandoned Checkout
Shopify Native Actions - Products
In this section, we will talk about the “Products & Collection” related actions. Botbuz support below customer related actions:
- Search for products
- Get Product Info
- Get Product Images
- Get Product Variants
- Search for Custom Collections
- Search for Smart Collections
- Get Collection Info
- Get Collection Products
Shopify Native Actions - Orders
In this section, we will talk about the “Orders” related actions. Botbuz support below customer related actions:
- Get Shop Info
- Lookup Discount Code
- Create Discount Code
- Search for draft orders
- Create draft orders for one product
- Create draft order for multiple products
- Create draft order with custom products
- Send an invoice for the draft order
- Apply discount to draft order
- Complete draft order
- Get draft order information
- Get order information
Shopify Native Actions - Ecommerce
In this section, we will talk about the “Ecommerce” related actions. Botbuz support below customer related actions:
- Add to Cart
- Remove from Cart
- Empty Cart
- Get Cart Items
- Create draft order From Cart
Shopify Native Actions - Meta Fields
In this section, we will talk about the “Meta Fields” related actions. Botbuz support below customer related actions:
- Create Meta Field
- Update Meta Field
- Get Meta Field Information
- Search Meta Fields
- Delete Meta Field
Create Shopify Private App
With Shopify, your bot can show and gather information during conversations, including customers, products, discounts and shop details.
But in order to integrate with your shopify store, you need to create an private app. so that Botbuz can connect with your Shopify App.
It’s a simple process, it will take about 5 mins to finish, here is the detail, step by step process.
Create a custom app
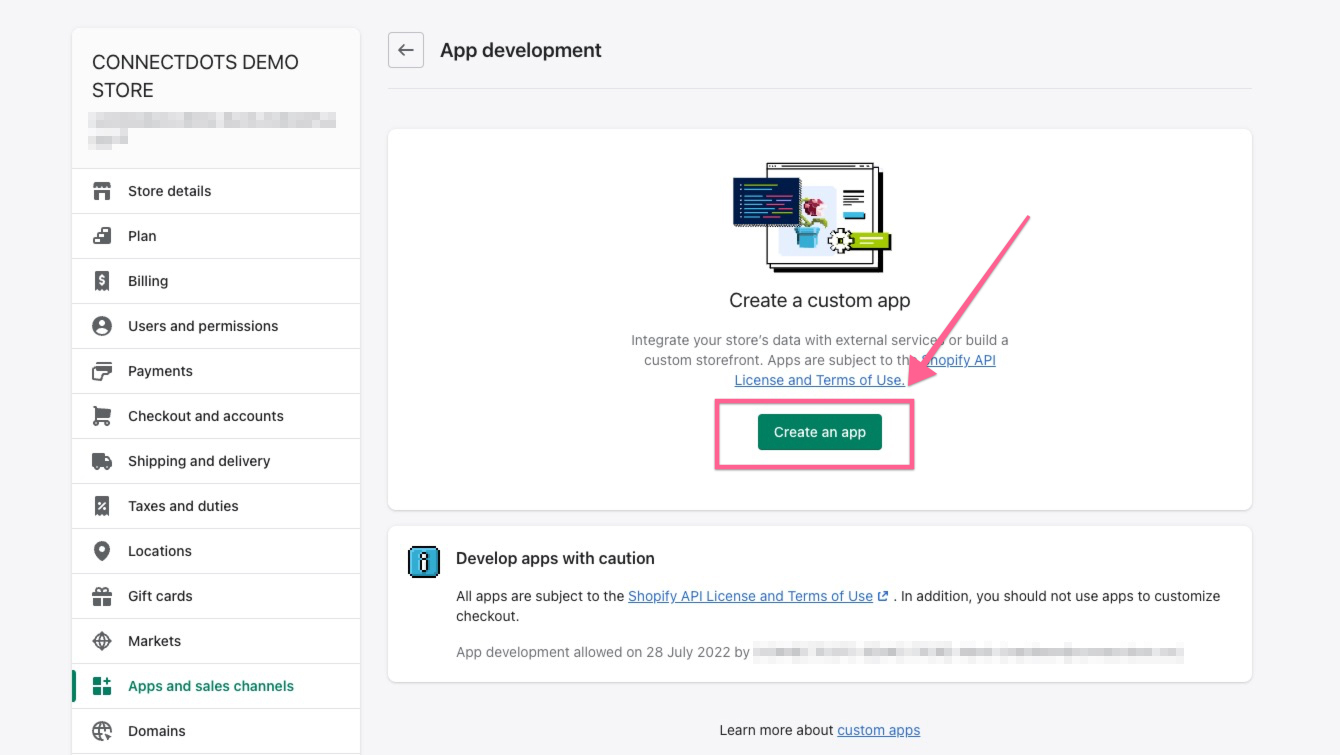
After you login your Shopify store, go to “Apps and sales channels”, and then you can create an app.
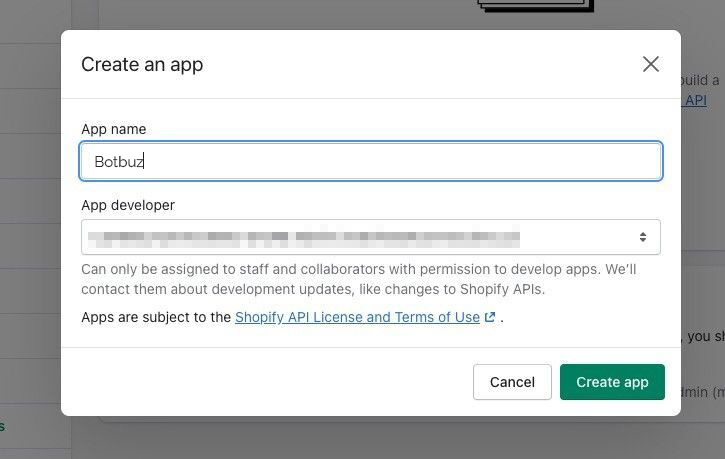
After you click “create an app” button, you will be redirect to below screenshot, give it a name, and then you will get the new app created.
Click the “Configure Admin API scopes”,
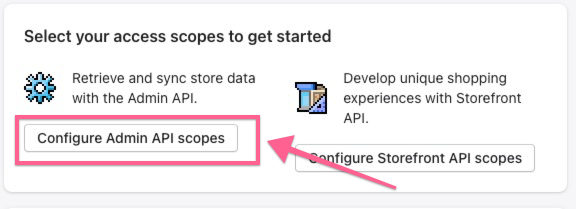
and then you need to give the permission to use the scopes below:
- Write_customers
- Read_customers
- Write_discounts
- Read_discounts
- Read_files
- Read_fulfillments
- Write_orders
- Read_orders
- Write_product_listings
- Read_product_listings
- Write_products
- Read_products
- Write_script_tags
- Read_script_tags
After you select all the scopes, save it.
That’s it. Now you have create your private app. It’s time for you to install the private app.
Install the private app
Install the App
After you create the app, and select all the necessary scopes, now you can install this app to your store.
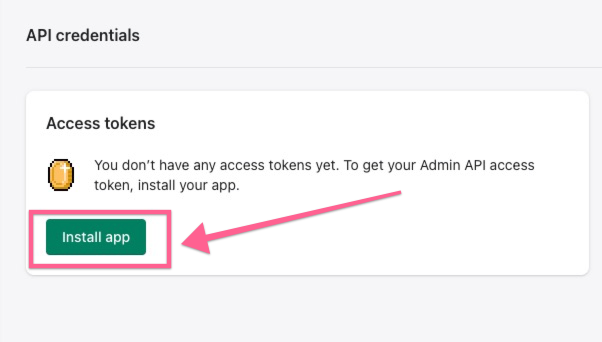
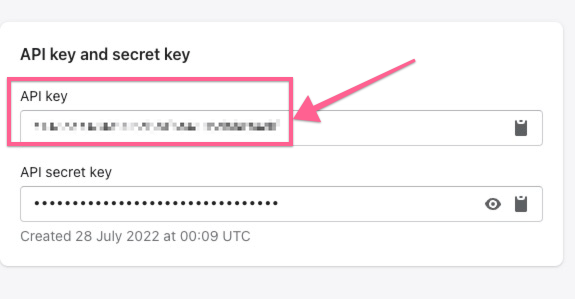
After you install the app, you will see the token as per screenshot below:

Now you can copy the token to the password in Botbuz. also copy the API key to the api key in Botbuz.
Last thing, you need to copy your Shopify domain(the one like this xxx.myshopify.com), please note, it’s not your own domain.
Connect with Botbuz
Connect with Botbuz
Now after you login in your Botbuz account, you can go to integrations, and then go to Shopify.
After you put your API key, Token & Shopify domain, your connection will be done!
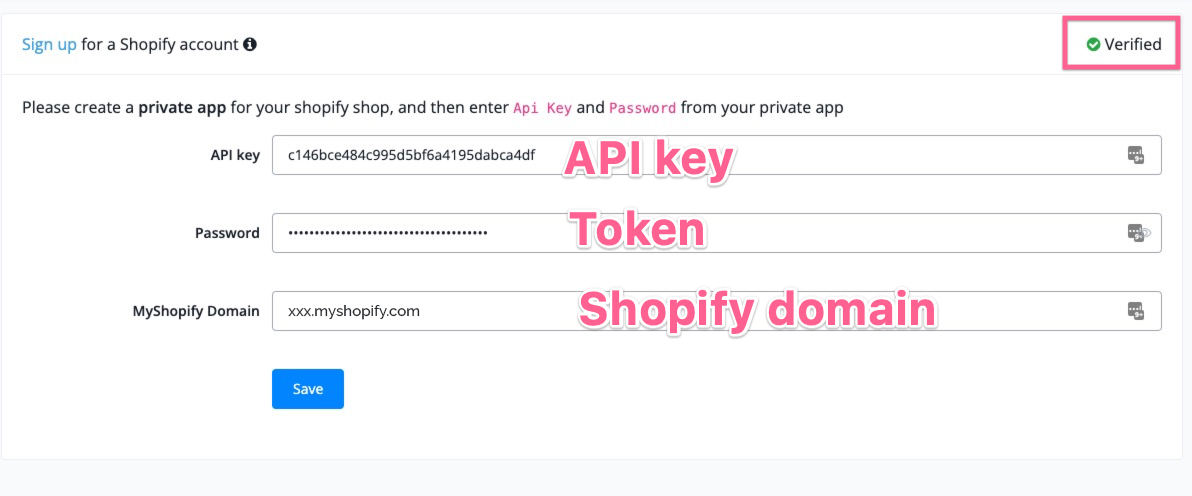
Please note, you need to put your shopify subdomain in the integration. it will be format like xxx.myshopify.com. Please don’t put your own custom domain here.
By following the above 4 steps, jumping to Shopify's website and logging in yourself, you can easily connect your Shopify account to Botbuz.
After connection, you will then be able to use Shopify in your Action step. As follow are the functions you can utilize.
Descriptions for each field will be put on corresponding photos.
TIP
The functions work via API calls. This means that, by giving some inputs, you get your outputs from the servers. The outputs are saved in custom fields for future uses.