Table of Contents
Email (SMTP / Gmail / Sendgrid)
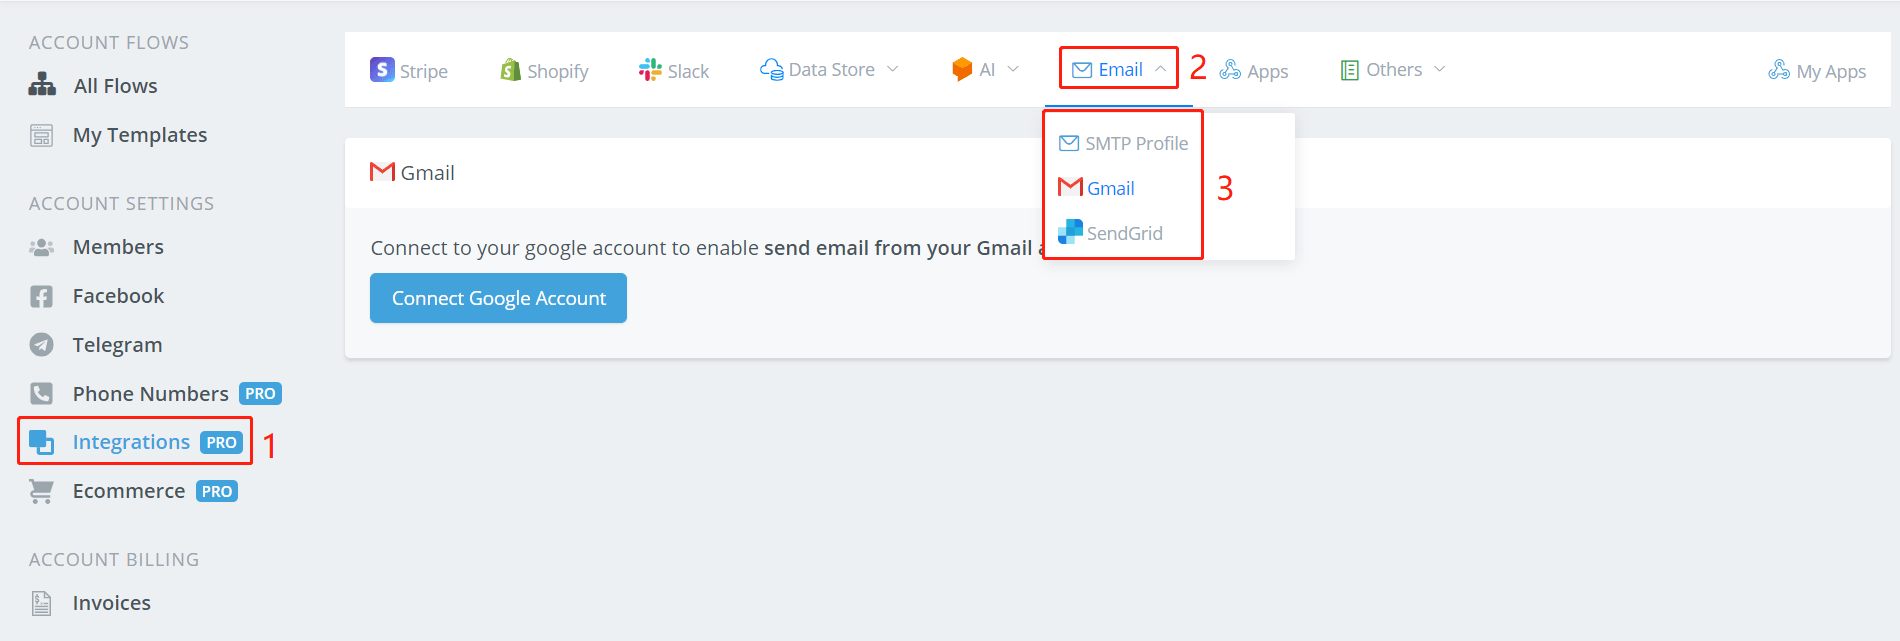
Botbuz supports 3 email integrations: SMTP Profile, Gmail and SendGrid. Follow step 1 to 3 to find them.
SMTP Profile Setup
Let's take Hotmail as an example.
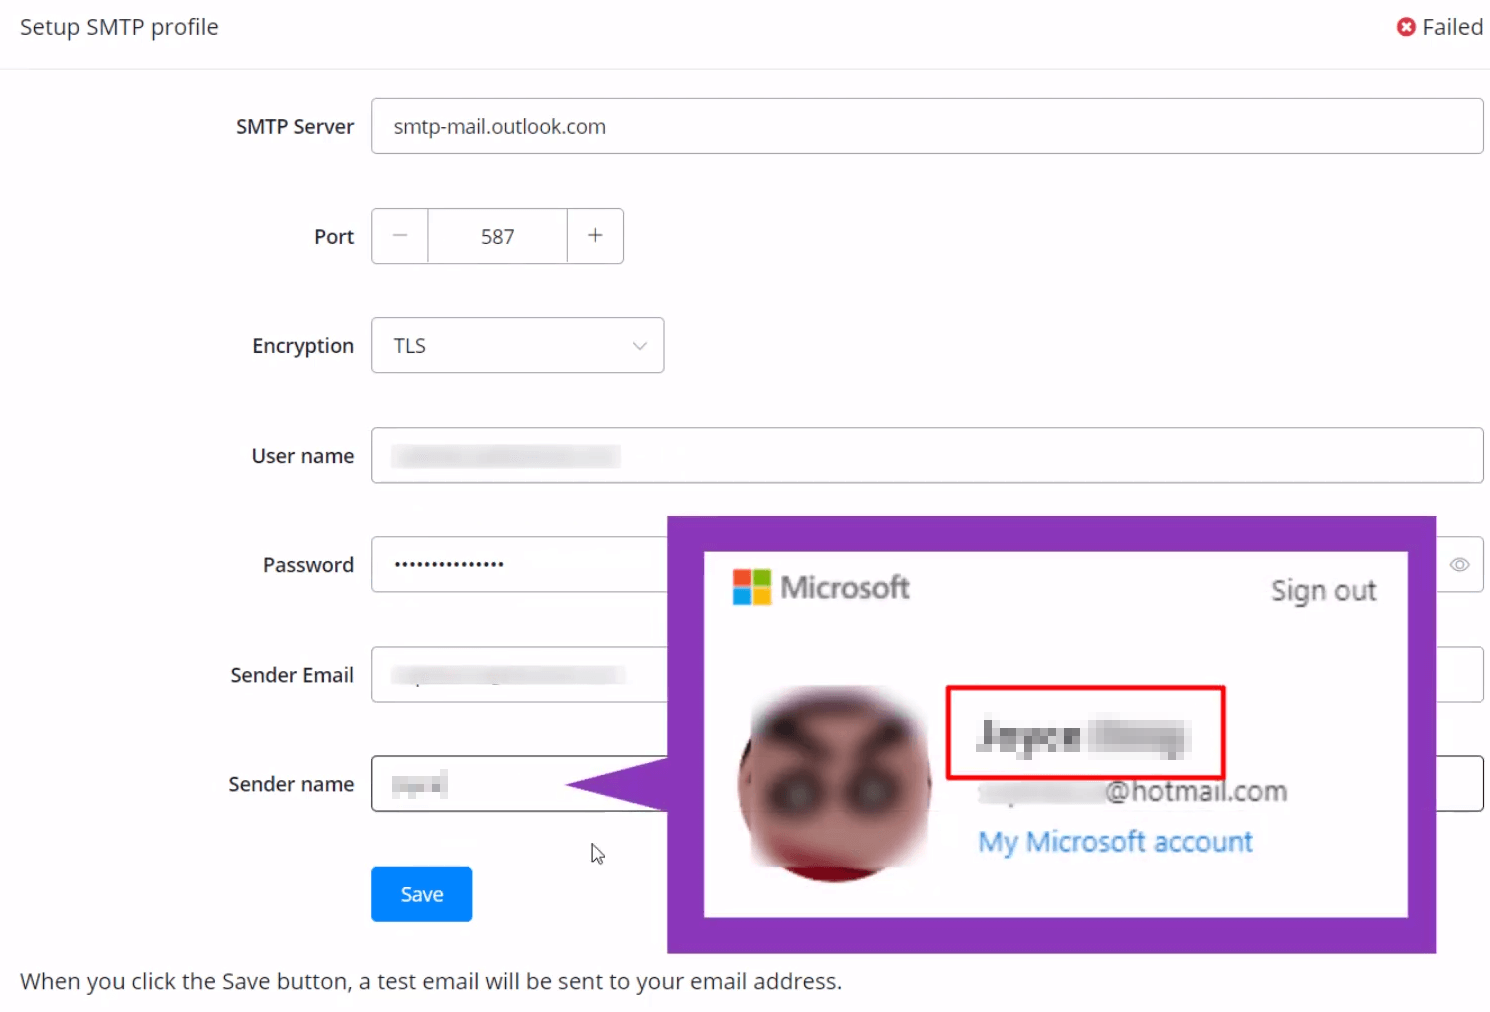
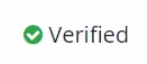
Fill in the fields as shown in the picture. Note that you can find your “Sender name” in your account detail. Once done, click “Save”. The sign at the upper right corner will tell you whether you succeed or not, either “Failed” or “Verified” like this:
You will receive a test email if your email address gets verified.
Gmail Setup
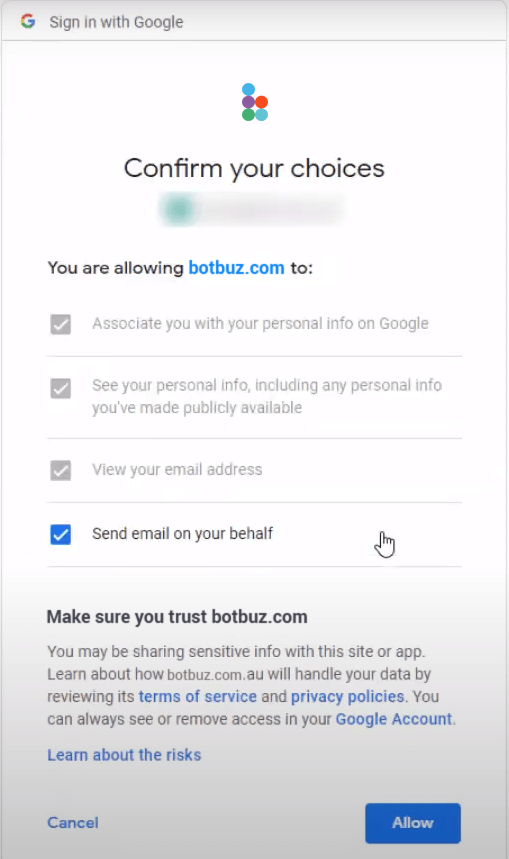
Click “Connect Google Account” after you choose “Gmail”.
Select one of your Gmail and “Allow” BotBuz to connect.
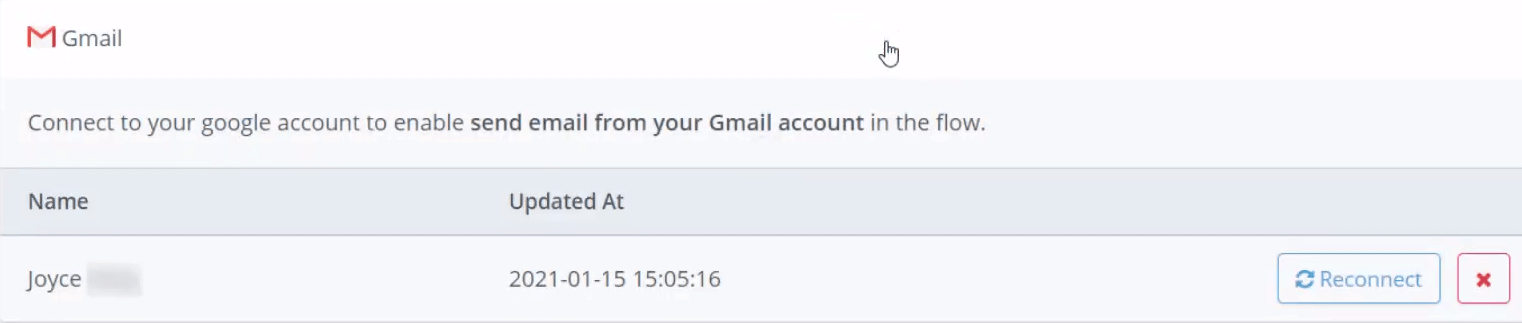
Once done, it looks like this:
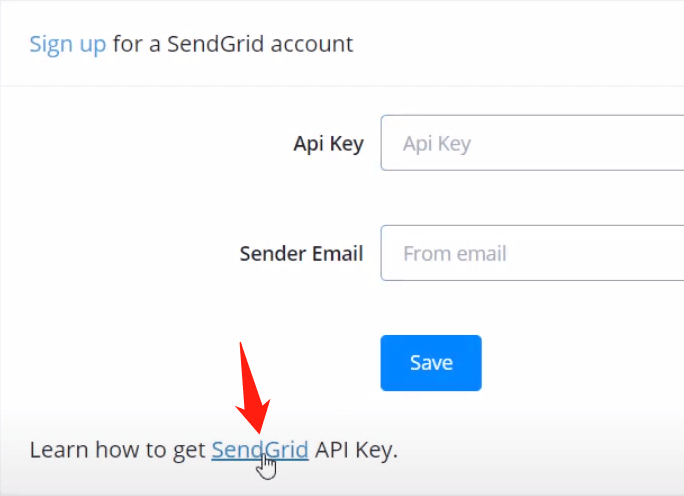
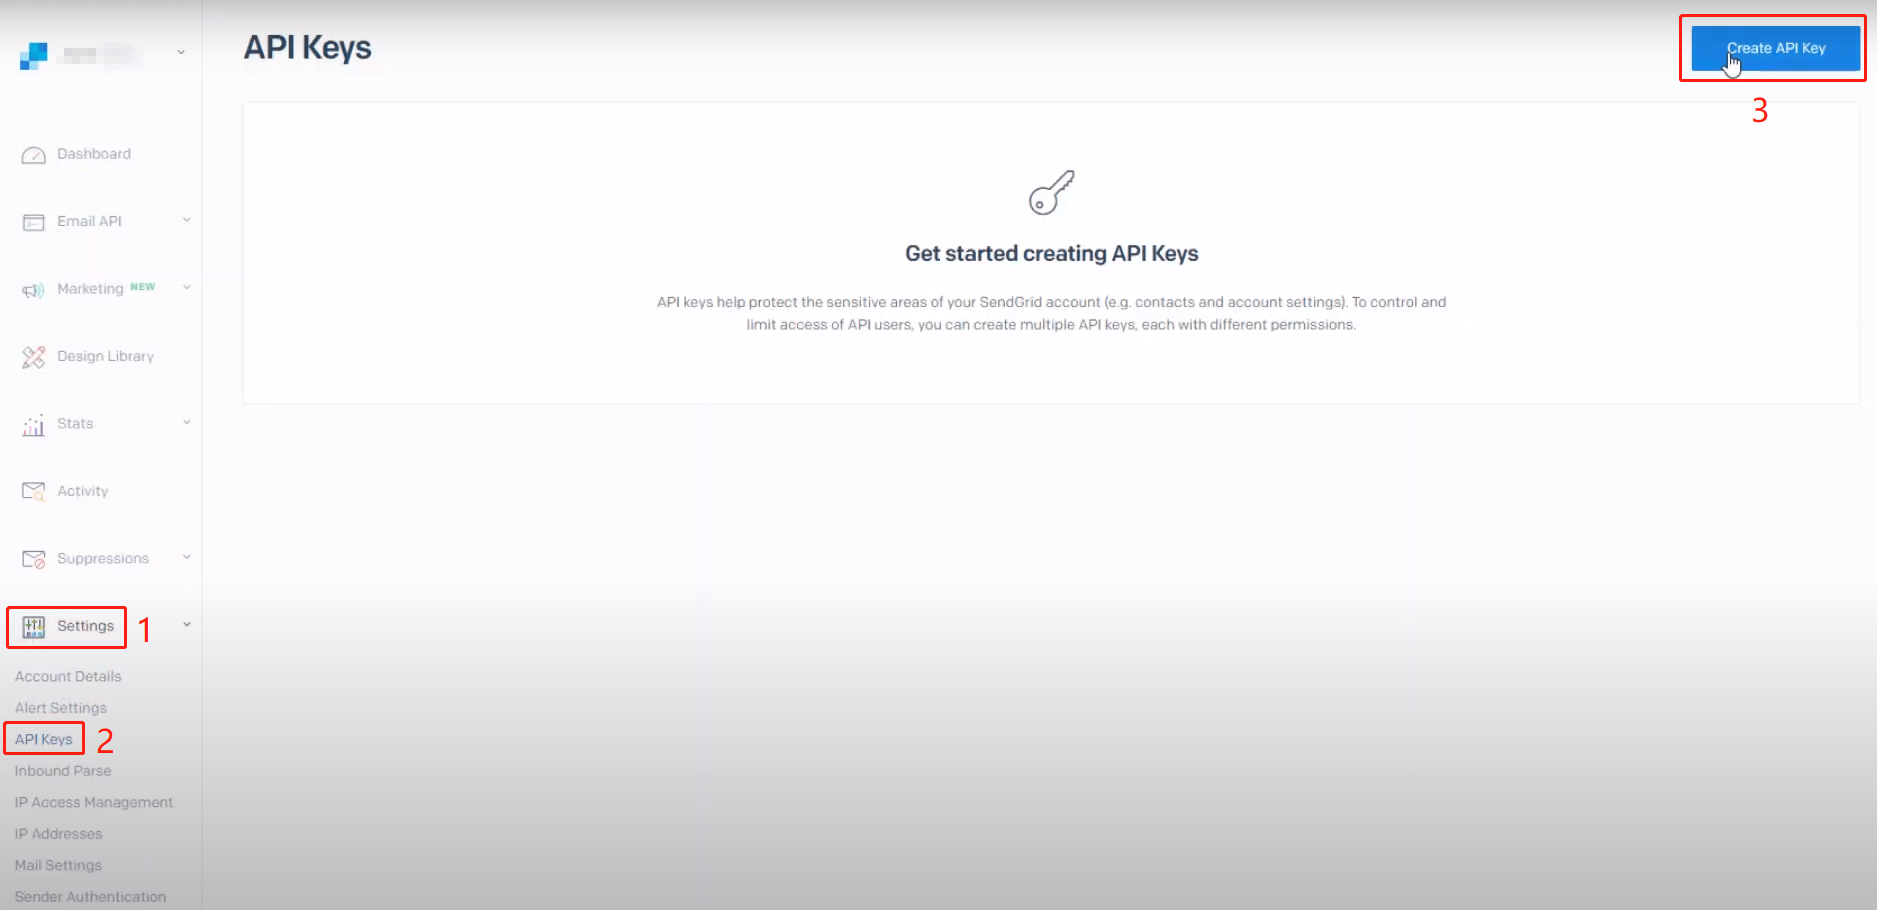
SendGrid Setup
Select “SendGrid”, open its website:
Log in yourself, enter your SendGrid “Dashboard” from the upper right corner.
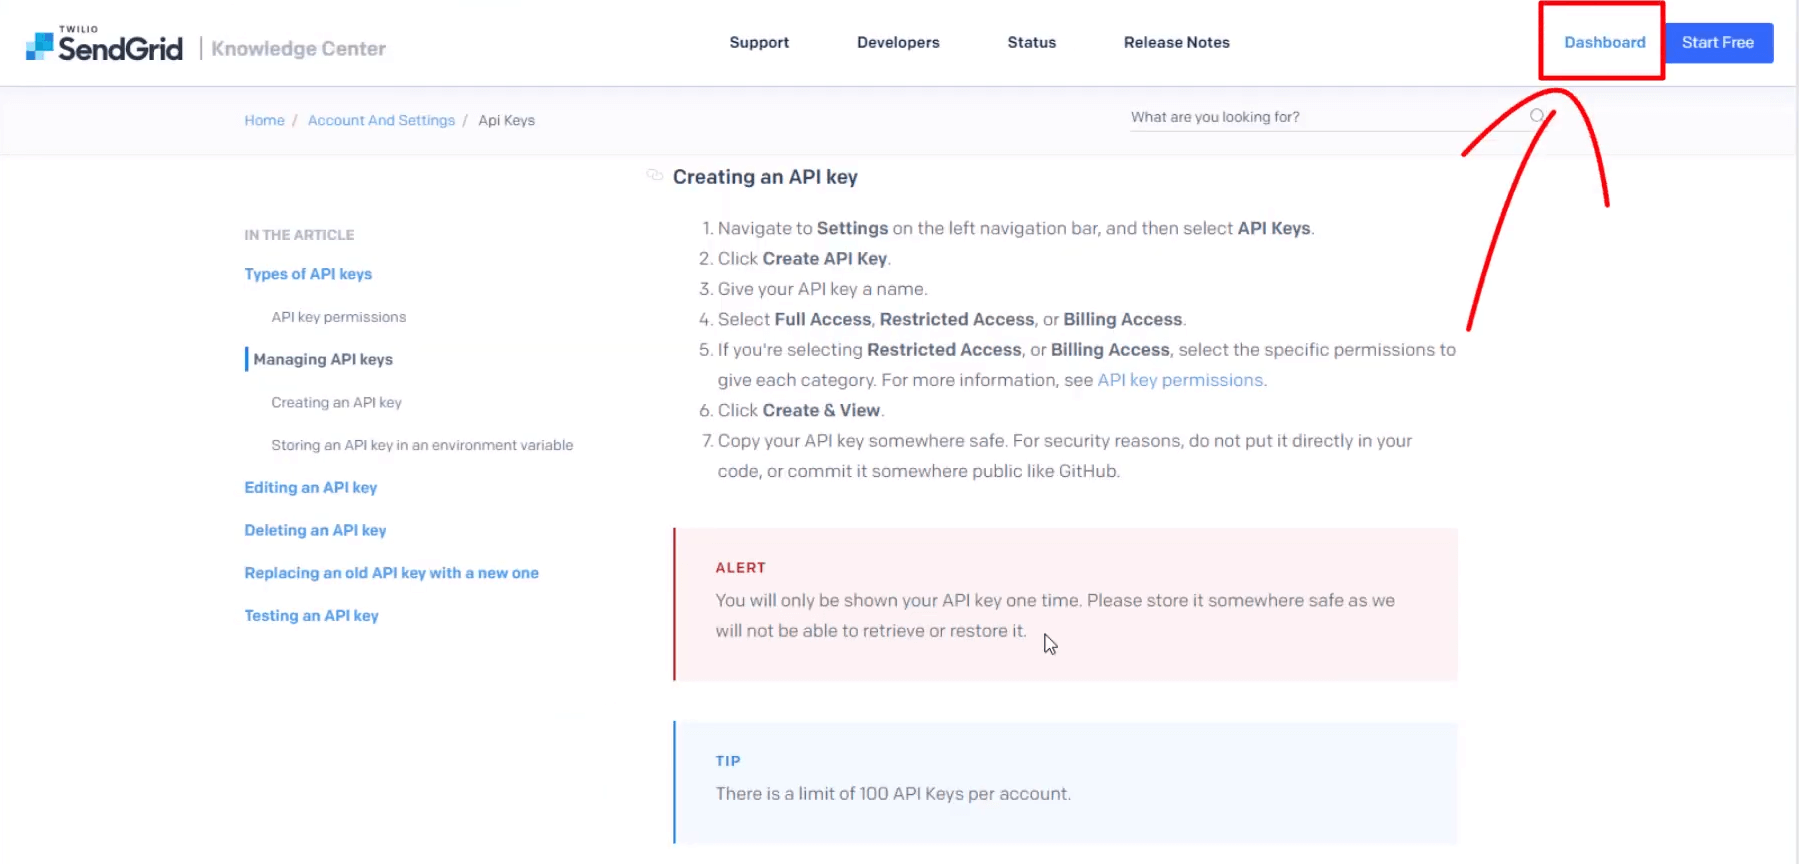
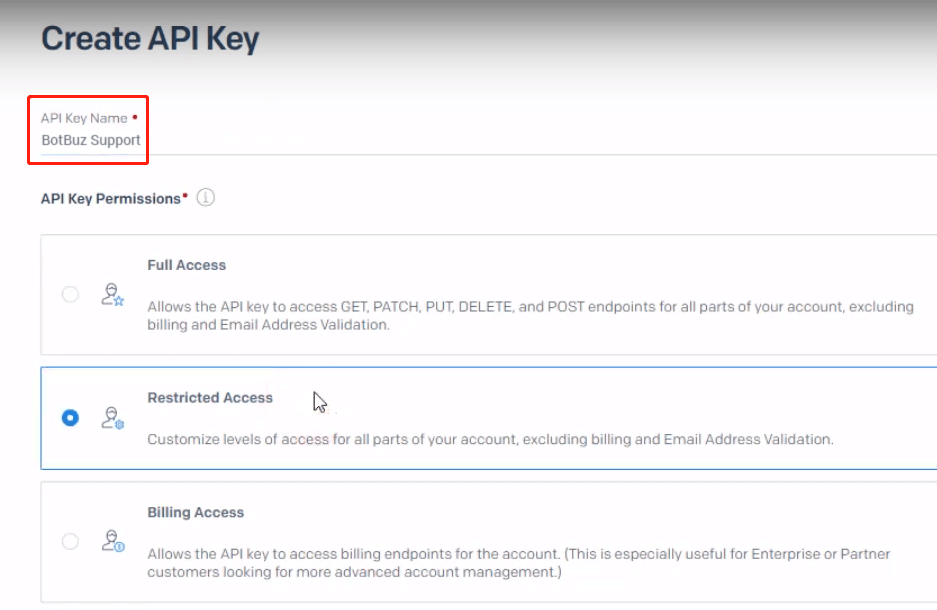
Follow step 1, 2 and 3 to create API key:
Give an API key name, select “Restricted Access”.
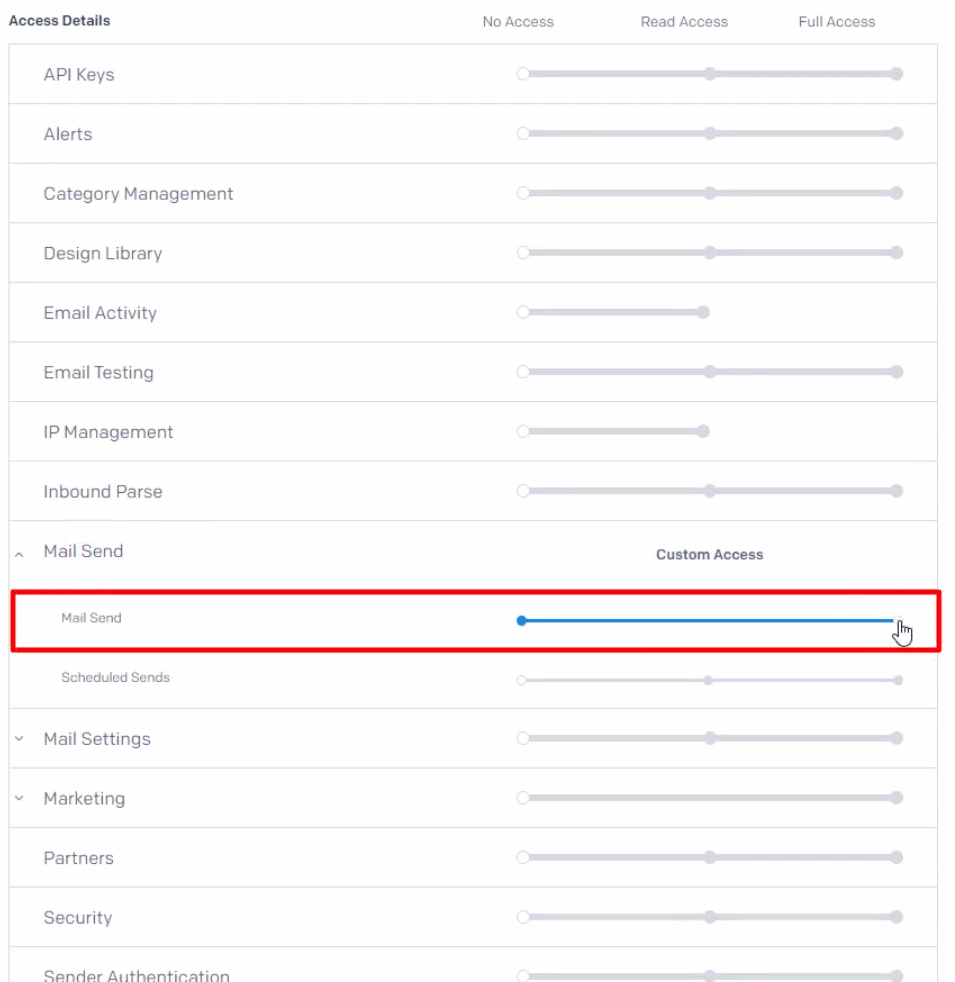
Make sure you give Botbuz full access to “Mail Send” and click “Create & View” at the very bottom of the page.
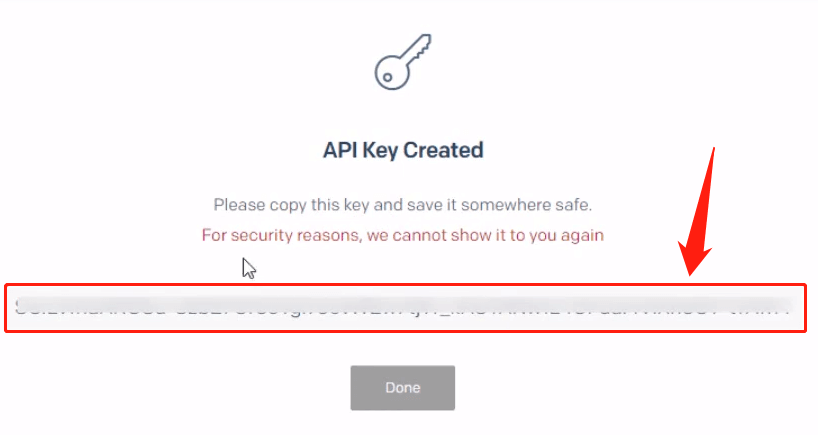
Once done, copy your key back to Botbuz.

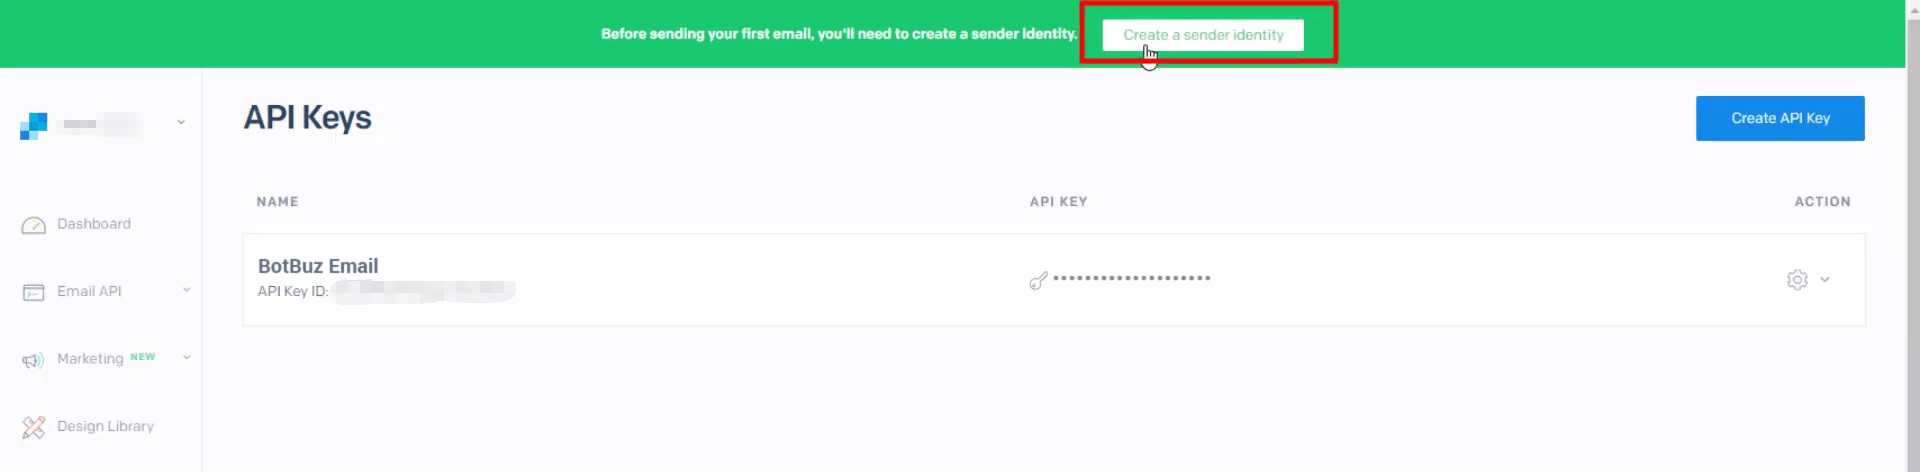
To get a “Sender Email”, let's get back to SendGrid's website again. Click “Create a sender identity” and “Greate a Single Sender”:

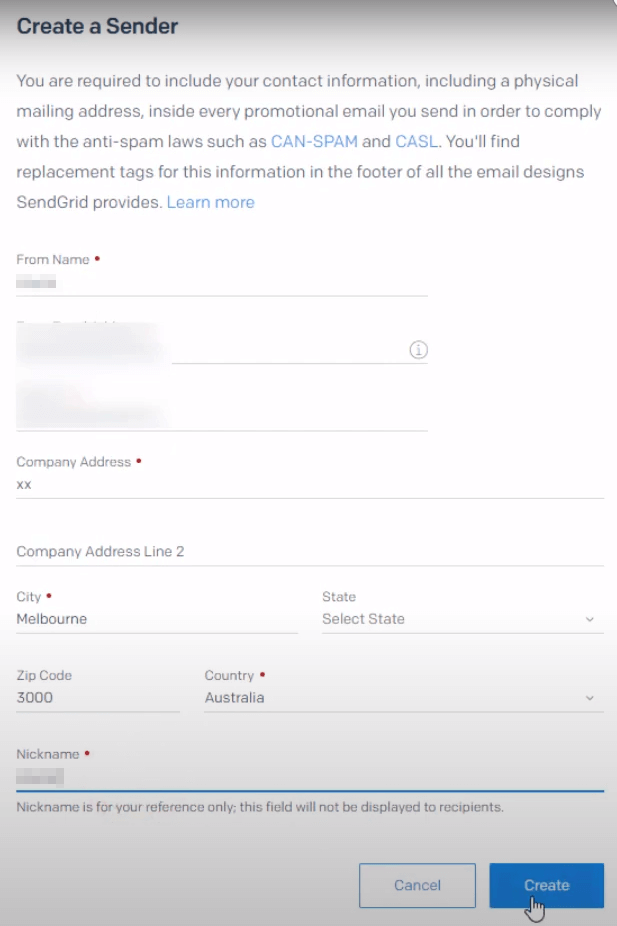
Fill in your details and “Create”:

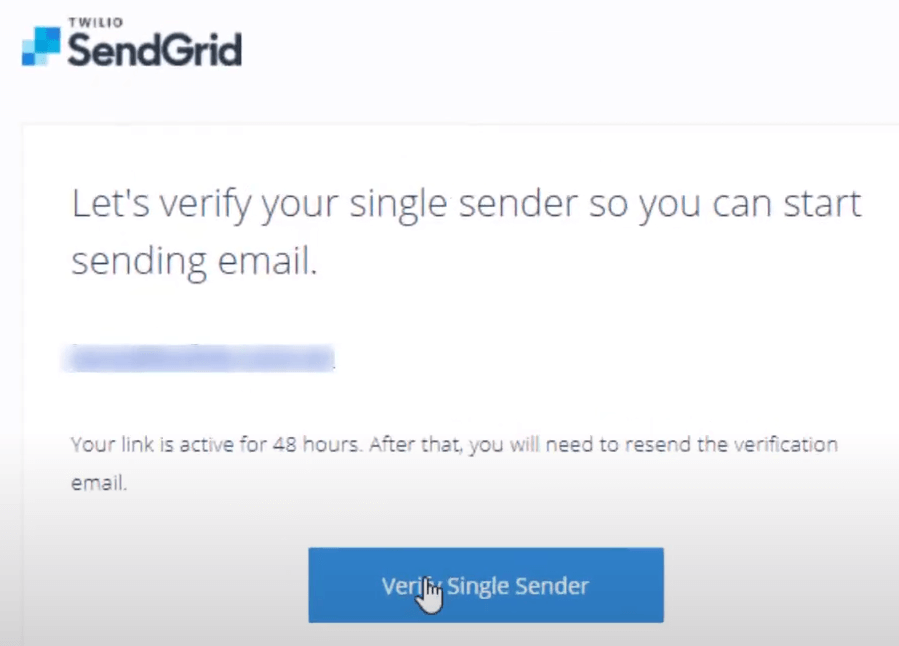
A verification link will be sent to your email, click it to get verified.
Send Email Notification
After setup your email integration, you can select it as a sender in your “Email Profile” list.
Send Email Step
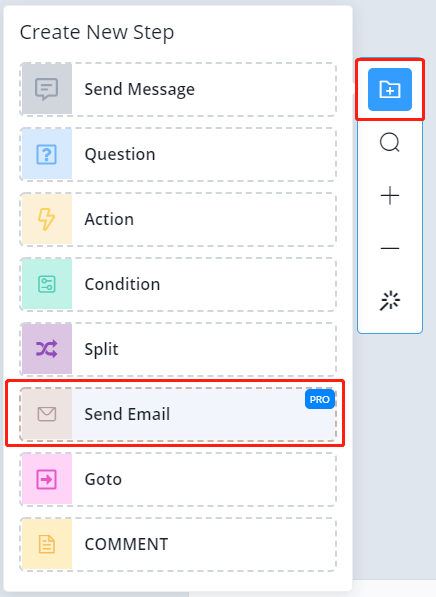
Add a Send Email step by right-clicking in your workspace or from the “Add new step” button:
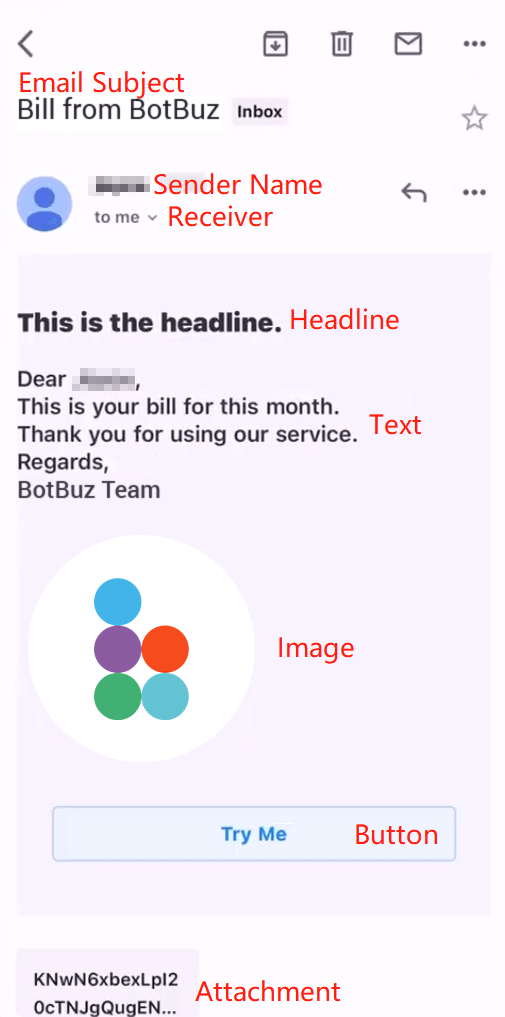
This is how a Send Email step looks like:
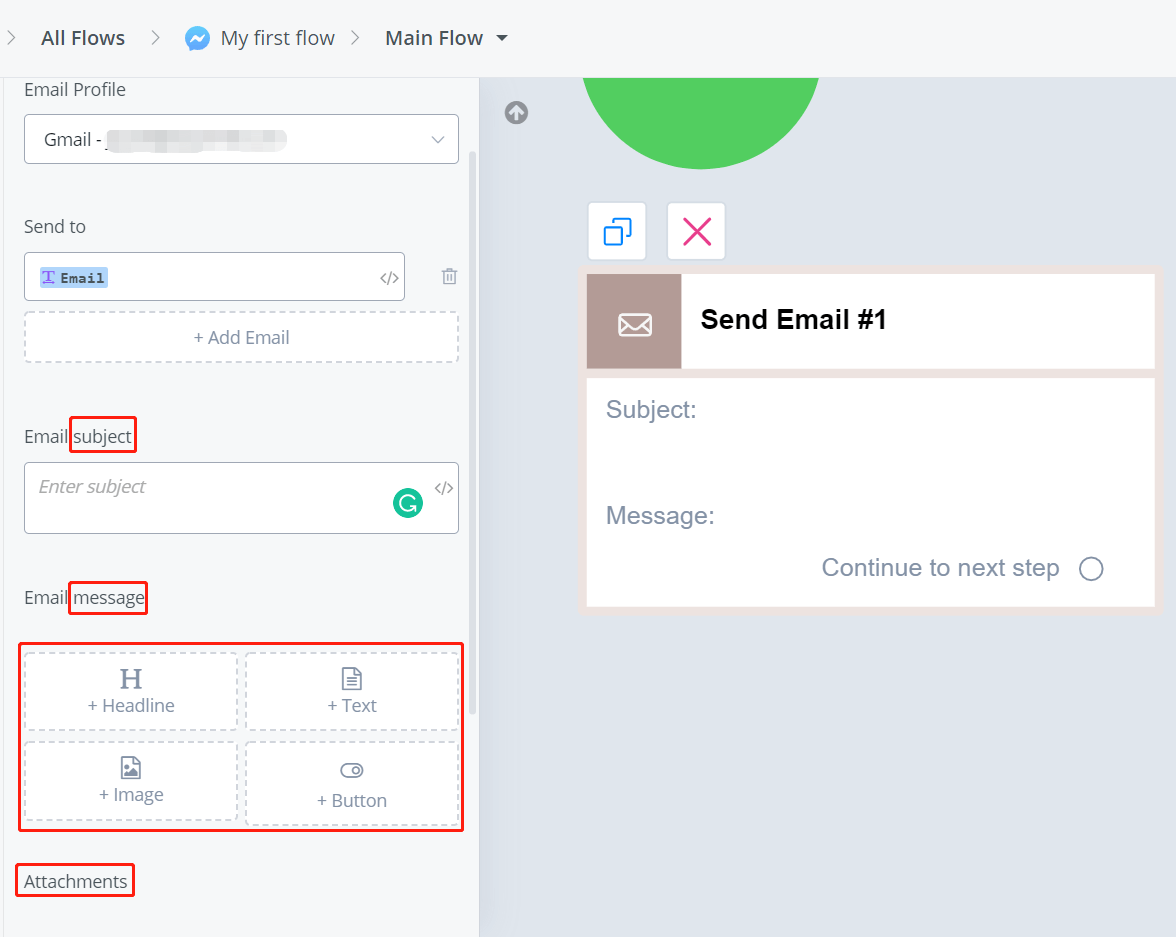
Name a sender and receiver. There are 3 blocks of information, subject, message and attachment. Feel free to add what you need.
This is an example of an email from the user's side: